CarWebshop is designed for online sales of cars. Your company must have a website and its own domain.
A) You can create the Buy-button in your WordPress site e.g. with Elementor and track it with Google Tag Manager
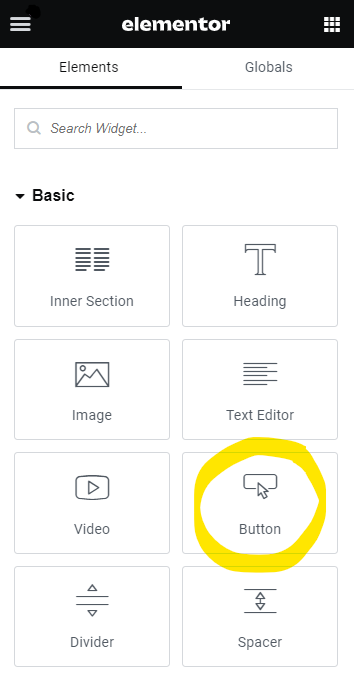
1. Open WP Editor and/or WP Elementor: Open the page or post in the editor where you want to add or modify a button
2. Select or Add a Button: If you want to add a new button, drag and drop the button widget to your desired location. If you want to edit an existing button, simply click on it.
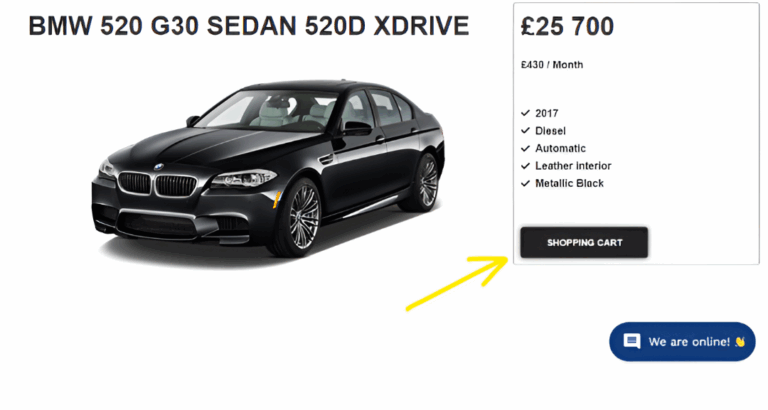
3. Set the Button ID: With the button selected, go to the Advanced tab in the left sidebar. Find the CSS ID field and enter your desired ID, for example, “my-custom-button”
4. Add the Script to Google Tag Manager
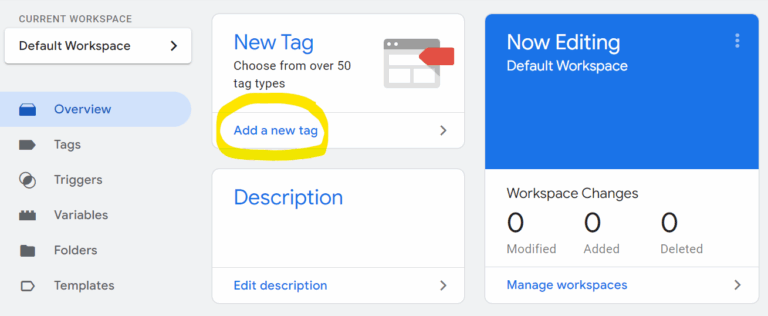
– Open Google Tag Manager – Create a New Tag
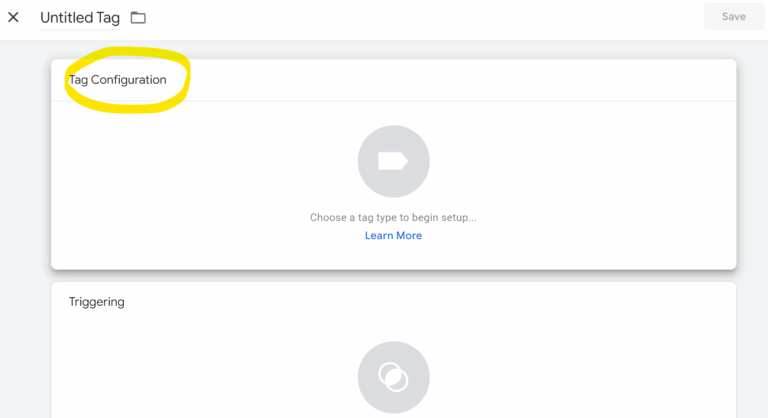
Then > Tag Configuration
– Choose the tag type > Custom HTML tag
Insert the following script, replacing “my-custom-button” with the ID you set in your website editor AND “COMPANYNAME” with the name you got from us
<!– Insert the shopping cart script –> <script src=”https://cdn.smilee.io/scripts/COMPANYNAME.js”></script> <!– Attach the portalClick function to an existing button on your site –> <script> document.getElementById(‘my-custom-button‘).addEventListener(‘click’, function() { window.portalClick(); }); </script>
– Add a Trigger: Create a trigger to define when the tag should be fired. For example, use the “All Pages” trigger if you want the script to be active on all pages
– Save and Publish: Save your tag and publish the container
B) If you don’t have Google Tag Manager, you can add the script to the source code of your site.
If you need any help, please contact us: support@smilee.io